

I am always careful when I work with electrical parts like a generator avr. Safety is very important, so I watch every step closely. I use a guide that shows me each step. This helps me not make mistakes and keeps me safe. Before I begin, I read all the instructions again. I also check my workspace two times. Getting ready the right way makes me feel sure and helps stop accidents.
Key Takeaways
- Always stay safe by wearing gloves and safety glasses when you work with electrical parts. Use tools with insulation to stop shocks and handle the generator AVR safely. Turn off the generator and take out the battery before you start any work so you do not get hurt. Keep your work area clean and bright to help you stay neat and not lose small pieces. Label every wire before you unplug them so you can put them back right during setup. Pick the correct AVR model by checking things like voltage, power rating, and if it fits your generator. Test the generator after you finish to make sure the voltage is steady and look for problems. Take care of your AVR and test it often so it works safely and well for a long time.
Generator AVR Safety Precautions
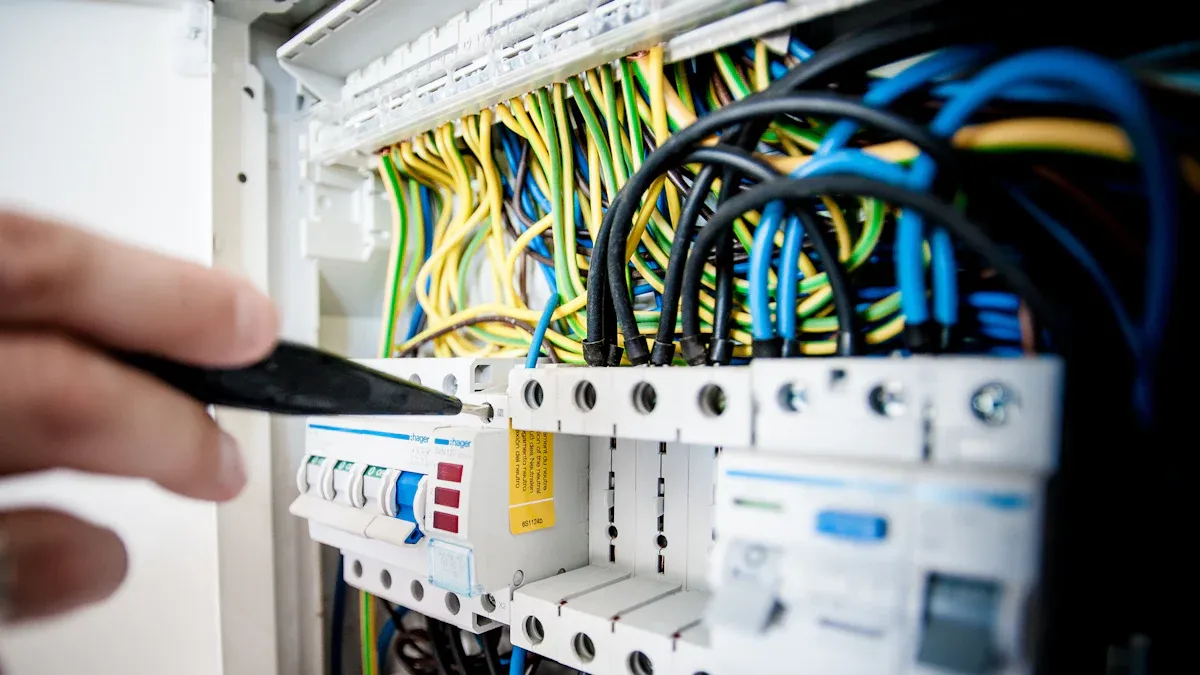
When I change a generator AVR, I always think about safety first. Working with electrical equipment can be risky, so I never skip safety steps.
Personal Protection
Gloves and Eye Safety
I wear protective gloves before touching the generator. Gloves protect my hands from sharp parts and shocks. I also put on safety glasses. These keep my eyes safe from dust, small pieces, or sparks when I take out or put in parts.
Insulated Tools
I use insulated tools for every job. Insulated screwdrivers and wrenches help stop electrical injuries. I check my tools before starting to make sure the insulation is good. This habit keeps me safe and helps stop short circuits.
Tip: I keep a face shield and arc-rated clothes close by when I work with live wires or test things.
Power Off Procedures
Shut Down Generator
I turn off the generator all the way before doing anything else. I flip the main power switch and make sure the generator is not giving power to anything. If the generator was running, I let it cool down. Hot parts can burn, so I wait until everything is cool.
Disconnect Battery
I disconnect the battery and all power sources. I take off the negative cable first, then the positive one. This makes sure there is no power flowing while I work. I check again that all connections are off before I keep going.
Note: I never hurry this step. Taking time to turn off and disconnect everything helps stop accidents.
Workspace Setup
Clean, Flat Surface
I set up my workspace on a clean, flat table. I move away any mess or loose things. This makes it easy to find my tools and parts. A neat space helps me stay organized and keeps me from losing small pieces.
Good Lighting
I make sure the area has bright light. Good lighting helps me see wires, screws, and labels well. I use a work light if I need more light. Bright light helps me avoid mistakes and makes sure I connect things right.
Here is a table that shows the most important safety steps I follow, based on what the manufacturer says:
| Safety Precaution | Description |
|---|---|
| Turn Off Generator Power | I always turn off the generator before I start. |
| Use Insulated Tools | I use insulated tools to stop shocks or short circuits. |
| Check Polarity and Phase | I check connections to stop damage to the AVR. |
| Grounding | I ground the generator to stop power surges. |
| Testing After Installation | I test the generator with a dummy load before using real equipment. |
| Protective Gear | I wear gloves, face shields, and arc-rated clothes when making connections. |
By following these steps, I make a safe place to replace the AVR. Careful planning and paying attention keep me and my equipment safe.
Prepare to Replace the Generator AVR
Planning is important before you replace a generator avr. I first check that I have the right model. I also make sure I have all the tools I need. This helps me not make mistakes. It also keeps my work safe and quick.
Identify AVR Model
Check Specifications
I look at my generator’s specifications before buying a new automatic voltage regulator. I check the type, power rating, voltage, and phase. I also look at the sensing input and excitation output. I make sure the size fits in the compartment and has enough airflow. Picking the right external AVR keeps things safe and working well.
- Type: Brushed or brushless
- Power Rating: Measured in kilowatts (kW)
- Voltage and Phase: Like 120V single-phase or 240V three-phase
- Sensing Input: Voltage the AVR reads
- Excitation Output: Power sent to field windings
- Physical Size: Enough space for secure mounting
I find out what type and model of voltage regulator my generator uses. If I am not sure, I use online resources to look up part numbers.
LETON POWER Compatibility
When I pick a LETON POWER AVR, I match its technical details to my generator’s alternator and excitation system. I check the input voltage range and output current capacity. I also look at voltage regulation accuracy and frequency response. I want features like fast transient response and low harmonic distortion. I make sure the AVR meets international standards and has the right certifications.
| Factor | Description |
|---|---|
| Technical Specifications | Match AVR model to generator’s alternator and excitation system. Verify voltage, current, and accuracy. |
| Industry Compliance | Confirm certifications for your region and application. |
| Performance Metrics | Look for stability, fast recovery, and low distortion. |
| Quality Assurance | Choose suppliers with strong QA and warranty terms. |
| Integration Capabilities | Ensure compatibility with engines and control systems. |
| After-Sales Support | Assess technical support and spare parts availability. |
Gather Tools and Parts
Screwdrivers, Wrenches, Multimeter
I get all my tools ready before I start. I use screwdrivers and wrenches to take off covers and parts. I keep a multimeter close to test voltage and check connections.
New AVR Unit
I make sure I have the new AVR unit ready. I check that it matches my generator’s specifications and fits in the compartment.
Review Manual
Manufacturer Instructions
I read the manufacturer’s instructions before I begin. The manual tells me how to turn off the generator, find the AVR, and disconnect wires. I label each wire so I can reconnect them the right way.
Safety Warnings
I pay close attention to safety warnings in the manual. The instructions remind me to disconnect the generator from any load and test the system after installation. I follow each step to make sure the replacement goes well.
Tip: I always keep the manual nearby while I work. It helps me check each step and avoid mistakes.
Getting ready makes replacing the AVR safe and easy. I feel sure when I have the right parts, tools, and instructions.
Remove Old Generator AVR
Access AVR Compartment
Remove Generator Cover
I always start by removing the generator cover. I use a screwdriver or wrench, depending on the fasteners. I keep all screws and bolts in a small container so I do not lose them. I lift the cover slowly and set it aside in a safe place. This step gives me clear access to the internal parts.
Locate Carbon Brush Holder
Next, I look for the carbon brush holder. This part sits near the alternator section. I check the manual if I am unsure about its location. The carbon brush holder often sits close to the generator avr. I make sure I can see all the wires and terminals before I move on.
Disconnect Wires
Detach Positive/Negative Wires
I take a careful look at the wires connected to the old AVR. I always start with the negative wire. I use an insulated screwdriver to loosen the terminal. I pull the wire away gently. Then, I move to the positive wire and repeat the process. I avoid pulling on the wires directly. Instead, I grip the connectors to prevent damage.
Label Connections
Before I remove any more wires, I label each one. I use masking tape and a marker to write down where each wire goes. This step helps me remember the correct order during installation. I double-check my labels against the manual. If I see extra wires or unusual colors, I take a quick photo with my phone for reference.
Tip: Good labeling saves time and prevents mistakes when I install the new AVR.
Unscrew and Remove AVR
Use Proper Tools
I select the right screwdriver or wrench for the AVR mounting screws. I turn each screw slowly to avoid stripping the heads. I keep the screws in my container with the others. If the AVR feels stuck, I wiggle it gently until it comes free. I never use force, as this could damage the mounting bracket or nearby parts.
Handle Old AVR Safely
Once the screws are out, I lift the old AVR out of its compartment. I hold it by the edges to avoid touching any exposed terminals. I place the old unit on a non-conductive surface, such as a rubber mat or wooden board. If the AVR looks damaged or burnt, I make a note for future troubleshooting.
Here is a quick checklist I follow during removal:
| Step | What I Do |
|---|---|
| Remove Cover | Unscrew and set aside safely |
| Locate Brush Holder | Find near alternator and AVR |
| Detach Wires | Remove negative, then positive, using tools |
| Label Connections | Mark each wire clearly |
| Unscrew AVR | Use correct tool, keep screws safe |
| Remove AVR | Lift gently, avoid touching terminals |
By following these steps, I make sure I do not damage any parts or lose track of connections. Careful removal sets me up for a smooth installation of the new generator avr.
Install New Automatic Voltage Regulator
Putting in a new automatic voltage regulator needs patience and care. I always use clear steps to make sure I stay safe and the generator avr works right.
Position New AVR
Align Mounting Points
First, I put the new AVR into its spot. I check if the holes on the AVR match the holes on the generator frame. This is important because if the AVR is not lined up, it might shake or have loose wires later. I also look to see that the cooling fins and vents are open. This helps the AVR stay cool when it is running.
Secure Placement
After lining up the holes, I use the right screws to hold the AVR in place. I tighten each screw the same amount, but I do not make them too tight. A snug fit keeps the AVR from moving around. I also check if the metal case is grounded. This keeps things safe and cuts down on electrical noise.
Tip: I always check again to make sure the AVR sits flat and does not touch other parts. This stops short circuits and helps heat move away from the AVR.
Connect Wires
Double-Check Connections
Before I hook up any wires, I look at the ends of the cables. I make sure the copper is clean and not broken. Clean wires help make a good connection. I look for color marks or labels on the wires and on the AVR. This makes it easier to match each wire to the right spot.
- I keep the generator turned off while I do this.
- I match each labeled wire to the right spot on the AVR.
- I use small clamps or screws to hold the wires tight.
- I look for any extra labels that might mean special jobs.
After I connect each wire, I check my work again. I look at my labels and the manual to be sure. This helps me not make mistakes that could break the new AVR or the generator.
Tighten Terminals
I use an insulated screwdriver to make each terminal tight. I check that the wires do not move or fall out. Tight wires help keep the voltage steady and stop the terminals from getting too hot. I do not make the screws too tight, so I do not break anything.
Note: I always put the positive and negative wires in the right places. If I mix them up, the AVR might not work or could break.
Final Assembly
Replace Cover
When I finish the wires, I put the generator cover back on. I line it up with the screw holes and make sure no wires get caught. I use the same screws and tighten them in a cross shape to spread the pressure.
Secure All Components
I check that every part is tight and in the right place. I gently pull each wire to make sure it is secure. I also look for any tools or screws left behind. A neat and tight setup helps the generator work safely and well.
Callout: LETON POWER AVRs give very accurate voltage control (up to ±0.5%), react fast to load changes, and have strong safety features. These things help keep power steady and protect the generator and anything plugged in.
When I put in the new avr, I always follow these steps to make sure the upgrade is safe and works well. Careful work helps the new AVR use its best features, like low total harmonic distortion (THD), wide frequency range, and strong safety systems. Doing each step right makes me sure my generator will work great.
Test Generator After AVR Replacement
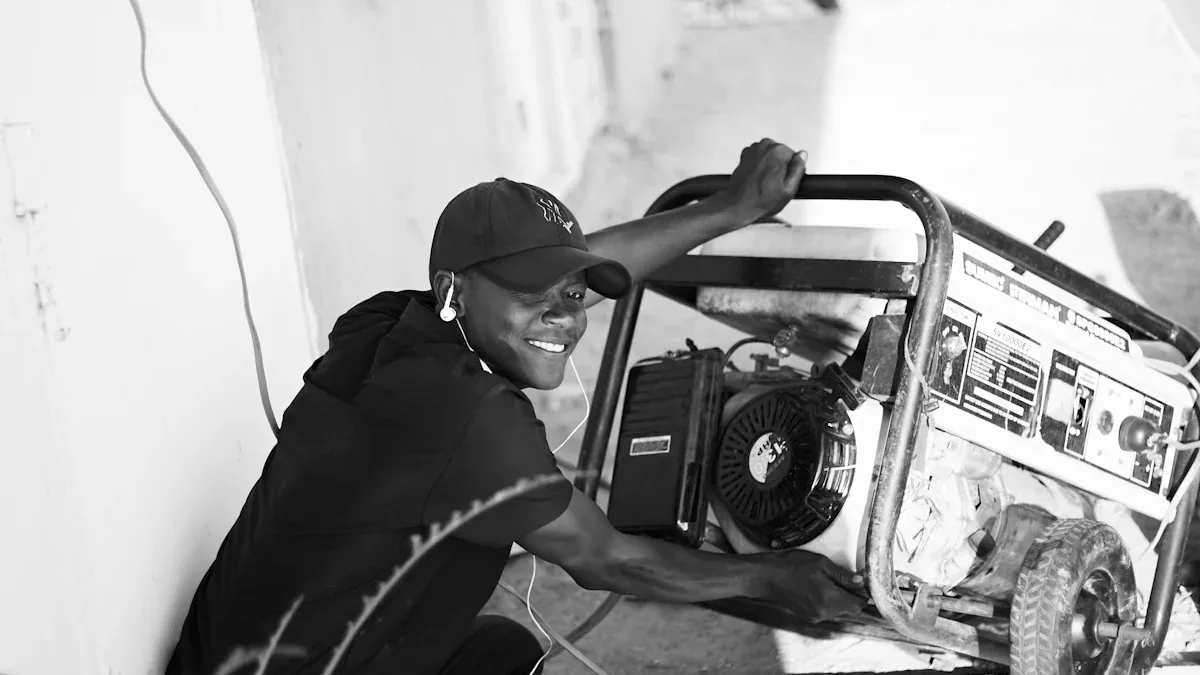
After I put in the new AVR, I test the generator. Testing helps me find problems early. It keeps my equipment safe.
Initial Power-Up
Safety Check
Before I turn on the generator, I use a safety checklist. I look at the enclosure for damage. I check if the mounting base is stable. I look for cracks or loose bolts. I make sure vibration isolators are not broken. I close all doors and panels tightly. I look under the generator for leaks. I check for oil, fuel, or coolant leaks. I clean out any trash from vents. I look at output cables for cuts. I check if the insulation is worn. I test circuit breakers to see if they work. I look at outlets and the panel for damage. I check GFCI protection. I tighten connection lugs. I look for rust or corrosion. I make sure fire extinguishers are close and working. I read all safety signs and warnings. I check grounding rods and cables. I make sure lockout and tagout devices are ready.
Tip: I always do these checks. Safety is the most important thing.
Monitor for Issues
When I turn on the generator, I watch for problems. I look for steady output voltage. I do not want voltage swings. Swings can make lights flicker or break electronics. I check for overvoltage. Overvoltage can hurt motors. I check for undervoltage. Undervoltage can turn off devices. I listen for the AVR reacting to load changes. I want the generator to avoid trips or shutdowns. I watch for brownouts or blackouts. I make sure voltage stays steady during changes.
Voltage Output Test
Use Multimeter
I use a multimeter to check output voltage. I put the probes on the output terminals. I compare the reading to the generator’s rated voltage. I look for a steady number. I test a few times to make sure voltage does not jump or drop.
Confirm Stable Output
I make sure voltage output is stable by following steps. I look at the AVR for wear or damage. I keep the unit clean. Clean units stop electrical problems. I test voltage output often. I listen for strange sounds from the generator. I watch for sudden shutdowns or restarts. I check the AVR’s physical condition. I look at the diagnostic system for error codes.
| Criteria for Confirming Stable Voltage Output | Description |
|---|---|
| Regular Voltage Regulator Testing | I check and test voltage with a multimeter. |
| Monitor Power Output Stability | I watch for voltage changes or drops. |
| Listen for Unusual Sounds | I listen for odd noises. |
| Check for Unexpected Shutdowns or Restarts | I notice any sudden stops or starts. |
| Inspect Physical Condition of AVR | I look for wear or damage. |
| Regular Diagnostic Checks | I check for error codes or alerts. |
Functional Check
Load Test
I do a load test to see how the generator avr works. I check oil, coolant, fuel, batteries, belts, hoses, and air filters first. I start the generator and let it warm up. I write down RPM, voltage, and frequency. I add load in steps. At each step, I record power, voltage, frequency, and temperature. I do a quick load change and a shedding event. I watch how fast voltage and frequency recover. I look for alarms, trips, or strange smells.
| Step | Description |
|---|---|
| 1 | Check fluids, batteries, belts, hoses, and filters |
| 2 | Start, warm up, record RPM, VAC, Hz |
| 3 | Add load in steps, record data |
| 4 | Quick load change and shedding event |
| 5 | Watch for alarms, trips, or odd signs |
| 6 | Cool down under light load if needed |
| 7 | Check for leaks or damage after test |
Stable Operation
I want the generator to run well under load. I check that voltage stays steady. I look for fast recovery after load changes. LETON POWER AVRs help with quick response, low harmonic distortion, and strong protection. These features keep my generator and devices safe.
Note: Regular testing and watching closely help me trust my generator for every job.
Troubleshoot Generator AVR Issues
Even after careful installation, I sometimes face issues with the generator or the new AVR. I always follow a step-by-step approach to find and fix the problem. Here are the most common issues I see and how I handle them.
No Start
Check Connections
When my generator does not start after replacing the AVR, I check all the wire connections first. I look for loose or disconnected wires at the AVR terminals. I make sure each wire matches the label I made during installation. If I see any corrosion or dirt on the connectors, I clean them with a dry cloth. Sometimes, a simple loose wire can stop the generator from starting.
Inspect Fuses
If all the wires look good, I check the fuses next. I find the fuse box and look for any blown fuses. I replace any damaged fuses with the correct type and rating. A blown fuse often means there was a short circuit or overload. I always use a multimeter to test the fuses if I am not sure.
Tip: I keep spare fuses in my toolbox. Quick replacement saves time during troubleshooting.
Unstable Voltage
Recheck Installation
Unstable voltage can cause lights to flicker or equipment to shut down. I start by checking my installation. I make sure all terminals are tight and wires are in the right place. I look for any signs of overheating or burnt smells near the AVR. I also check that the AVR sits flat and has good airflow.
- Voltage fluctuations often happen when the load changes quickly or the environment is very hot or cold.
- Overvoltage or undervoltage can damage both the generator and connected devices. The AVR should keep voltage within safe limits.
- Poor power quality, like voltage spikes or dips, usually means the AVR is not regulating properly.
- Generator overloading can also cause unstable voltage. I make sure I do not connect too many devices at once.
Test AVR
If I still see problems, I test the AVR itself. I use a multimeter to measure the output voltage. I compare the reading to the generator’s rated voltage. If the voltage jumps up and down, the AVR may not be working right. I check for error lights or codes on the AVR if it has a display. If I have a spare AVR, I swap it in to see if the problem goes away.
Error Codes
Consult Manual
When I see error codes on the generator or AVR, I open the user manual. The manual lists each code and what it means. I follow the steps in the manual to fix the issue. Sometimes, the code points to a wiring problem or a failed part.
Contact Support
If I cannot solve the problem, I contact technical support. For LETON POWER AVRs, I reach out to their support team. I give them the model number, error code, and a description of what I have tried. The support team often helps me find a solution quickly.
Note: Keeping good records of my troubleshooting steps helps support teams assist me faster.
| Common AVR Issues | What I Check First | Next Steps if Not Fixed |
|---|---|---|
| No Start | Connections, Fuses | Test battery, call support |
| Unstable Voltage | Installation, Load, AVR | Swap AVR, check environment |
| Error Codes | Manual, Wiring | Contact technical support |
By following these steps, I solve most AVR problems quickly and safely. Careful troubleshooting keeps my generator running smoothly and protects my equipment.
Choose the Right Generator AVR
Picking the right generator avr is very important. It helps my generator work better and last longer. I always check technical features, look at different brands, and use smart tips to choose.
LETON POWER AVR Features
Precision and Protection
I want my generator to give steady power. LETON POWER AVRs keep voltage very close to the right number (up to ±0.5%). This means my machines get the same voltage, even if the load changes fast. The AVR reacts quickly and keeps voltage within ±1% in less than one second. There are built-in safety features like overvoltage, undervoltage, and overexcitation protection. These features stop my generator and devices from getting hurt.
| Feature | Benefit |
|---|---|
| High Accuracy | Keeps voltage steady |
| Fast Response | Recovers quickly after changes |
| Multiple Protections | Prevents electrical damage |
| Low THD (<5%) | Delivers clean power |
Environmental Adaptability
I use my generator in many places. LETON POWER AVRs can work in very hot or cold weather, from -40°C to +85°C. The metal case and strong terminals do not rust or get dirty easily. I check the IP rating to see if the AVR is good for my area. A higher IP rating means better safety from water and dust. International marks like CE, UL, and RoHS show the AVR is safe and good quality.
Compare Brands
Stamford, Leroy-Somer, Marathon
I look at LETON POWER and other big brands. Stamford, Leroy-Somer, and Marathon are all trusted names. Leroy-Somer AVRs have many world certifications like LCIE, DNV, INERIS, EFECTIS, UL, BSRIA, TUV, CCC, and GOST. These show the products are safe and work well. Stamford and Marathon also make AVRs that pass tough tests and work in hard places.
Certification Standards
I always look for certifications before buying. Certifications show the AVR is safe and works well. I look for marks like CE, UL, and RoHS. These marks mean the AVR passed hard tests for safety and quality.
Selection Tips
Match Specifications
I match the AVR’s voltage and current to my generator. I check what kind of load I have. For resistive loads, a self-excited AVR is good. For inductive loads, I pick a PMG or AUX system. I use AVRs that do not rust for tough places. If I use more than one generator, I need AVRs that share the load. I pick digital AVRs for special jobs and analog ones for simple jobs. I use OEM parts or good copies for the best results.
Warranty and Support
I pick AVRs with a strong warranty. Good support helps me fix problems fast. I choose sellers who give help and have spare parts. Good support keeps my generator working longer.
Tip: I always read the manual and ask for help if I am not sure about which AVR to use or how to put it in.
By doing these things, I make sure my generator avr is right for me and works safely anywhere.
I think about safety every time I change a generator AVR. I plan each step before I start. This helps me not make mistakes. If I am not sure, I read the manual. Sometimes I ask an expert for help. Putting in the AVR the right way keeps my generator safe. It also helps it work well for a long time. I check and take care of the AVR often. Good care makes me feel calm. It also helps my generator last longer.
Remember: Staying safe and checking often keeps you and your generator protected.
FAQ
How do I know if my generator AVR needs replacement?
I look for voltage that goes up and down. Flickering lights are also a sign. If the generator shuts off a lot, I check the AVR. Burnt marks or strange smells near the AVR mean it might need to be changed.
Can I replace the AVR myself, or should I call a professional?
I can change the AVR if I follow safety rules and read the manual. If I feel confused or see lots of wires, I ask a trained technician for help.
What tools do I need for AVR replacement?
I use insulated screwdrivers and wrenches. I also use a multimeter. I keep labels, tape, and a small box for screws close by. These tools help me stay safe and keep things neat.
How do I choose the right AVR for my generator?
I match the AVR’s voltage and current to my generator. I check if the AVR fits my generator’s needs. I look for certifications and features like fast response and strong safety.
What should I do if the generator does not start after AVR installation?
I check all the wires and look at the fuses. I use a multimeter to test the voltage. If I still have problems, I read the manual or call technical support.
How often should I test or maintain my AVR?
I test my AVR every few months. I look for damage, clean the unit, and check the voltage. Doing this often helps my generator work well and safely.
Is LETON POWER AVR compatible with most generator brands?
LETON POWER AVRs fit many generator brands. I always check the specs and read the manual to make sure before I install it.
What safety gear should I wear when replacing an AVR?
I wear insulated gloves and safety glasses. I also wear arc-rated clothes. I keep a face shield nearby. This gear keeps me safe from shocks, burns, and flying pieces.

