
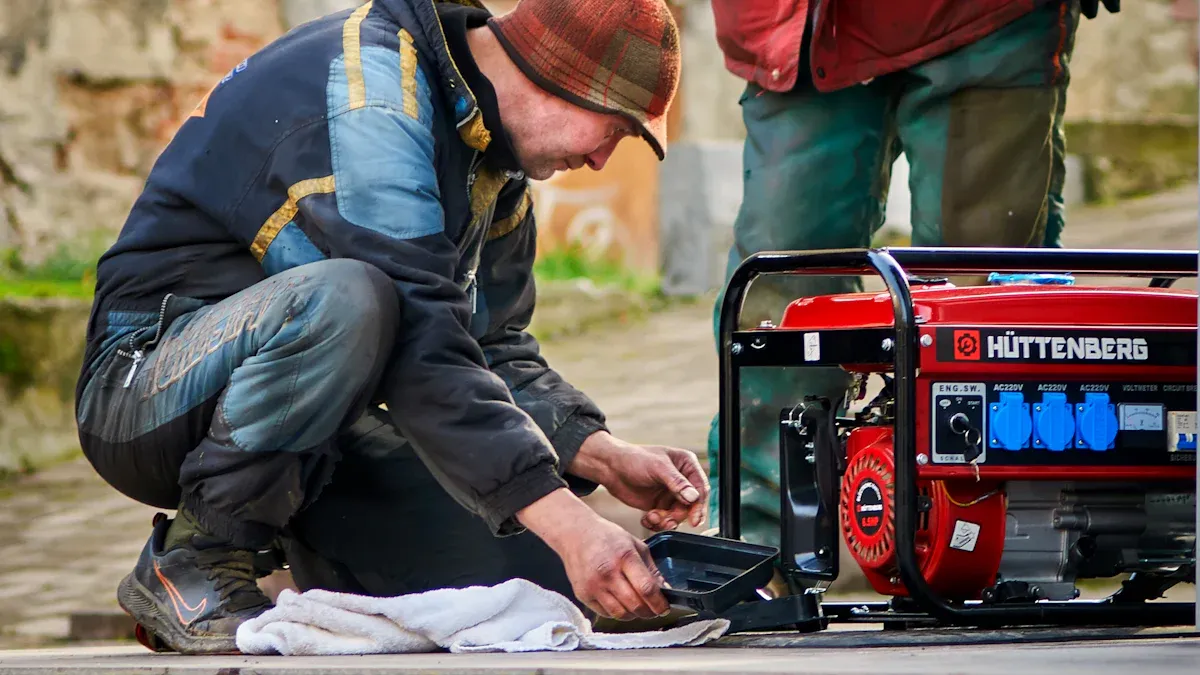
When I have to change your generator’s voltage regulator, I always think about safety first. I know it is very important to find the right automatic voltage regulator for generator models before I start. I make sure to put a label on every wire so I do not get confused later. I suggest reading every step in this guide before you start. This process is good for beginners and people who know a little about technical things.
Key Takeaways
- Always think about safety when you work on a generator. Wear gloves and safety glasses to keep safe from shocks and injuries.
- Before you start, unplug the generator and all devices. Let the generator cool down so you do not get burned.
- Put a label on each wire before you take it off. This helps you remember where each wire goes when you put them back.
- Get all your tools ready before you begin. Having screwdrivers, a multimeter, and labels nearby saves time and keeps things neat.
- Read the generator’s manual carefully. Knowing where the AVR is and seeing the wiring diagram helps you change it more easily.
- Test the generator after you finish installing. Use a multimeter to check the voltage and make sure the new AVR works right.
- Watch how the generator works after you replace the AVR. Listen for strange sounds or look for voltage changes to find problems early.
- Check and clean the AVR often. Look for damage and keep the area clean to help your generator last longer.
Safety First

I always think about safety before I work on a generator. Changing an automatic voltage regulator can be dangerous if I do not follow steps. There are many risks when I do this job. Here are the dangers I look out for:
- Overheating from a broken voltage regulator can hurt the generator.
- Unstable voltage can break things that are plugged in.
- Electrical shock can happen if I touch live wires or bad wiring.
- Generators get hot and use fuel that can catch fire.
- Carbon monoxide from the generator can kill if there is no fresh air.
Protective Gear
Gloves and Eye Protection
I put on gloves and safety glasses before I begin. Gloves keep my hands safe from sharp parts and electricity. Safety glasses protect my eyes from sparks or flying pieces. I always wear these, even if I feel sure of myself. Wearing gear helps me avoid getting hurt.
Power Down Procedures
Disconnect Generator and Load
I make sure the generator is off before I touch anything inside. I do these steps every time:
- I turn off or unplug all appliances to stop power surges.
- I let the generator run with nothing plugged in for a few minutes so it cools down.
- I switch the generator to “Off” and wait for the engine to stop.
- I look for oil leaks, leftover fuel, or dirt.
- If my generator connects to the house, I check that utility power is back safely.
I never touch the wires until the generator is off and cool. This keeps me safe from electric shock.
Safe Workspace
Ventilation and Organization
I get my workspace ready before I start. I find a clean, flat spot with good light. I make sure there is lots of fresh air. Good airflow keeps me safe from carbon monoxide. I keep my tools, the new voltage regulator, and the manual close by. Here is a table that shows what I check for a safe workspace:
| Characteristic | Description |
|---|---|
| Power Off | Generator is off and not plugged into any power. |
| Cooling Time | I let the generator cool so I do not get burned. |
| Protective Gear | I wear gloves and safety glasses. |
| Tools Required | I get screwdrivers, a multimeter, pliers, and wire cutters. |
| Clean Workspace | I work on a clean, flat spot with good light. |
| Accessibility | I keep all tools and parts nearby so I work faster. |
Tip: I always look for surge protection devices before I begin. This helps stop damage from sudden voltage jumps.
By doing these things, I stay safe and keep my area neat. I never hurry through this part. Safety is always the most important thing when I work on my generator.
Preparation Steps
I get ready before I work on my generator. Good planning helps me not make mistakes. It also makes the job easier. I split this into three steps. First, I find the AVR model. Next, I gather my tools. Last, I read the manual.
Identify AVR Model
I always do this step. Using the wrong automatic voltage regulator can hurt the generator. It can also make it work badly. I check the model number and compare it to the generator’s specs. Here is how I make sure I have the right AVR:
- I look at the old AVR and write down its make and model.
- I check the generator’s manual for the right AVR type.
- If I cannot find the original AVR, I look for one that matches.
- I ask an expert or the manufacturer if I am not sure.
Tip: I double-check the voltage and power rating on both the generator and the new AVR. This helps me avoid problems with matching parts.
Check Voltage and Power Rating
I read the labels on the generator and the AVR. I make sure the voltage and power rating are the same. If they do not match, I stop and get the right part. Using the wrong rating can break the generator or make it unsafe.
Gather Tools
I get all my tools ready before I start. This saves time and keeps me neat. Here is a table of the tools I use most:
| Tool | Purpose |
|---|---|
| Screwdrivers | Take out and put in screws |
| Labels | Mark wires so I know where they go |
| Multimeter | Test voltage and check connections |
| Pliers | Hold or bend wires |
| Wire Cutters | Cut wires when needed |
I also keep a notepad and pen close. I use them to write down wire spots or special notes.
Screwdrivers, Labels, Multimeter
I pick the screwdriver that fits the screws. I use sticky labels or tape to mark each wire before I take it off. My multimeter helps me test voltage and make sure the generator is safe.
Review Manual
I read the generator’s manual before I begin. The manual tells me where the AVR is and shows the wiring diagram. I look for the part about the AVR. Sometimes, the manual has pictures that help me find the right spot fast.
Locate AVR Section
I turn the pages until I see the AVR section. I look at the diagrams and read the steps. If I do not get something, I read it again or search online. Knowing the manual well makes the job safer and easier.
Note: Careful planning helps me not make mistakes and keeps my generator working well.
Locate and Remove Old AVR

Find AVR in Generator
Typical Placement
I always start by finding the automatic voltage regulator inside the generator. Most generators place the AVR under the main cover or near the control panel. Sometimes, I see it attached to the alternator housing. I check the manual for a diagram if I cannot spot it right away. The AVR usually looks like a small rectangular box with several wires connected to it. I make sure the generator is off and cool before I touch anything.
Tip: I keep a flashlight handy. Good lighting helps me see the AVR and the wires clearly.
Label and Disconnect Wires
Use Labels or Take Photos
Before I disconnect any wires, I label each one. I use sticky labels or masking tape and write down where each wire connects. Sometimes, I take a clear photo with my phone. This step saves me from confusion later. If I skip labeling, I risk connecting wires to the wrong terminals when I install the new AVR. I always double-check my labels before I move on.
Alert: Never skip labeling. Mixing up wires can damage the generator or the new AVR.
Remove AVR Unit
Unscrew and Handle Carefully
Once I finish labeling, I begin to remove the avr. I use the right screwdriver to loosen the screws that hold the AVR in place. I keep the screws in a small container so I do not lose them. I gently pull the AVR out, making sure not to tug on the wires. If the AVR feels stuck, I check for hidden screws or clips. I never force it out. I remove the avr slowly and set it aside in a safe spot.
Here is a simple checklist I follow when I locate the avr and take it out:
- Shut off the generator and disconnect it from any load.
- Locate the avr inside the generator.
- Label every wire or take a photo for reference.
- Disconnect the wires from the AVR.
- Remove the avr by unscrewing it carefully.
Note: I always handle the old AVR gently. Some units contain sensitive parts that can break easily.
By following these steps, I make sure I do not miss anything. Careful work at this stage makes installing the new AVR much easier.
Install New Automatic Voltage Regulator for Generator
When I put in the new avr, I go slow. Careful work keeps my generator safe and working right. I check that I have the correct automatic voltage regulator for generator models before I start. I follow each step so I do not make mistakes.
Position New AVR
Fit and Align Properly
First, I place the new automatic voltage regulator for generator where the old one was. I look to see if the mounting holes match the screw holes. The unit should sit flat and not shake. If it does not fit, I stop and check the model number again. Using the wrong part can cause problems later. I never push the regulator into place. A good fit helps the installation go well.
Tip: I always look at the new voltage regulator and the old one before I install. This helps me see any differences early.
Reconnect Wires
Match Labels to Terminals
Wiring is the most important part of this job. I use the labels or photos I made before to match each wire to the right terminal. I check every connection before I move on. To avoid wiring mistakes during replacement, I always:
- Make sure each wire goes to the right spot.
- Check for loose or broken wires before I connect them.
- Look at my labels and photos so I do not get mixed up.
- Ask a generator technician if I am not sure about something.
I connect the wires one by one. I do not hurry this part. If the terminals have numbers, I match “1” to “1” and “2” to “2.” If they have letters, I connect “F” to “F” (Field) and “A” or “ARM” to “A” or “ARM” (Armature). I make sure the big wire from the regulator goes to the battery’s positive terminal if my generator uses one.
Alert: Wiring mistakes during installation can break the automatic voltage regulator for generator or the generator.
Secure AVR
Tighten Screws and Check Stability
After I finish the wiring, I fasten the automatic voltage regulator for generator in place. I use the screws I saved and tighten them by hand. The unit should not move or make noise. I check that no wires are stuck under the regulator. A steady installation stops vibration damage when the generator runs.
Before I finish, I check all connections again. Here is my checklist for this step:
- Disconnect the battery ground terminal before you start.
- Find and mark all wires for the voltage regulator.
- Attach the small wires to the right generator terminals.
- Match each label to the correct terminal, using numbers or letters.
- Connect the big wire to the battery positive terminal if needed.
- Check every connection again to find any mistakes.
Note: Checking every connection during installation helps stop expensive errors during replacement.
I never skip this last check. Careful work means my generator will be safe after replacement. If I am not sure, I ask a professional for help. Good installation keeps my equipment working for a long time.
Test and Monitor Generator
After I put in the new automatic voltage regulator, I test the generator. Careful testing helps me find problems early. This keeps my equipment safe. I follow steps to make sure everything works right.
Power Up Safely
Step-by-Step Startup
I never hurry when I start the generator after fixing it. Here is what I do:
- I check all wire connections and screws again.
- I reconnect the battery ground terminal if I took it off.
- I make sure no tools or loose parts are near the generator.
- I turn the generator to “On.”
- I let the generator run for a few minutes with nothing plugged in.
Tip: I listen for strange sounds or smells when I start the generator. If I notice anything odd, I turn it off right away.
Check Voltage Output
Use Multimeter
When the generator runs well, I use my multimeter to check the voltage output. This step is important for voltage control. It helps me know the new automatic voltage regulator works. I set my multimeter to the right voltage range. I measure the output at the generator terminals.
Here is a table that shows what I look for in a working generator:
| Output Type | Voltage Output | Current Output | Power Output |
|---|---|---|---|
| Continuous | 73 Vdc | 3.5 Adc | 255w |
| Forcing | 105 Vdc | 5 Adc | 525w |
If my readings match these numbers, I know the voltage control system works well. If the numbers are too high or too low, I stop and check my work again.
Note: I always wear insulated gloves when I test live wires. This keeps me safe from electric shock.
Monitor Performance
Listen and Watch for Issues
After I test the generator and check the voltage, I keep watching and listening for problems. I look for flickering lights or warning lights on the control panel. These can mean the automatic voltage regulator is not working or there is another problem.
Some signs of trouble are:
- Generator output that goes up and down.
- Battery that charges too much or not enough.
- Electrical accessories that only work sometimes.
I also check for slow startup, flashing alerts, or worn wires and connectors. If I see any of these problems, I stop using the generator and look for what is wrong.
Alert: Ignoring these warning signs can cause bigger problems or damage electronics.
By following these steps, I make sure my generator runs safely and smoothly after every repair. Careful testing and watching help me find problems early and keep my equipment working well.
Troubleshoot After You Change Your Generator’s Voltage Regulator
After I put in a new automatic voltage regulator, I always check for problems before I finish. Sometimes, problems show up right away. Other times, they happen after the generator runs for a while. I use simple steps to find and fix these problems. Here are the most common issues I see and what I do about them.
No Voltage Output
Check Connections and Fuses
If my generator does not make any voltage after I change the voltage regulator, I follow a checklist to find the problem. I do each step to figure out what is wrong:
- I look at the circuit breaker to see if it is off or broken.
- I check the automatic voltage regulator for damage and make sure all wires are tight.
- I look at the rotor brushes to see if they are worn and change them if needed.
- I test the stator windings for shorts or ground faults.
- I check all wires and connections, tighten loose ones, and clean dirty terminals.
- I look at the capacitor to see if it works and change it if it is bad.
- I test the excitation circuit by measuring resistance and fixing it if needed.
- I make sure the generator is not working too hard by checking the load.
Tip: I always start with easy checks first. Many times, a loose wire or a circuit breaker is the problem.
Voltage Fluctuations
Inspect AVR and Wiring
If I see the voltage going up and down after I put in a new voltage regulator, I know I need to check for problems. I look for these common causes:
- Changing how much power is used can make the voltage unstable.
- Old parts inside the generator can cause trouble.
- Bad wire connections can make the voltage change.
- Heat or wetness can hurt how the generator works.
- Putting in the voltage regulator wrong can also make the voltage go up and down.
I check each thing one at a time. I make sure all wires are tight and the regulator is put in right. If I find old or broken parts, I change them.
Alert: If you ignore voltage changes, it can hurt electronics and make the generator not last as long.
Overheating or Noise
Recheck Installation
Sometimes, after I change the voltage regulator, I hear weird sounds or see the generator getting too hot. These are signs that something is wrong and need to be checked fast. I look for:
- Loud or strange sounds, like clicking, banging, or grinding. These can mean broken parts or things rubbing together.
- Getting too hot or seeing smoke, which can happen if the radiator is blocked or air cannot move.
- Weird shaking, which might mean loose parts or damage inside.
- Always getting hot, which could mean the air filter is blocked or the cooling system is bad.
I always check my work again if I see any of these problems. I make sure all screws are tight and no wires are stuck. I clean out anything blocking the cooling system and change broken parts.
Note: Fixing problems quickly when you hear noise or see overheating can stop bigger problems and keep your generator safe.
By doing these troubleshooting steps, I keep my generator working well and avoid expensive repairs.
Maintenance Tips
Taking care of my generator’s automatic voltage regulator (AVR) helps me avoid big repair bills and keeps my generator working. I follow a simple routine to make sure my generator stays safe and runs well.
Inspect Regularly
Clean and Check for Wear
I always keep the AVR and its area clean and dry. Dust, water, and rust can cause problems. I use a dry cloth to wipe the area and look for rust or water. I check that the air vents are open so the AVR does not get too hot. If vents are blocked, the AVR can get damaged.
Every few months, I look at all the wires and connections. I search for loose wires or worn spots. I tighten any loose wires I find. I also check the sensing and power wires for cracks or broken spots. If I see damage, I change the wires right away.
Tip: I ask a professional to check my AVR after big repairs or if the voltage is not steady. A technician can adjust settings to keep things working right.
Replace When Needed
Signs of AVR Failure
I watch for signs that show the AVR needs to be changed. Some common signs are:
- The voltage goes up and down, which can hurt appliances.
- The generator will not start because the AVR cannot control the alternator.
- The alternator gets hot, which means the AVR is not working.
- I smell burning or see burnt spots on the AVR.
- The generator’s frequency changes and does not stay the same.
- The AVR is old, even if it still works, because old parts can have hidden problems.
If I see any of these signs, I change the AVR as soon as I can. Waiting too long can make things worse and cost more to fix.
Use Quality Parts
Consider LETON POWER and Other Brands
When I need a new AVR, I pick a good one. I look for real or approved parts that fit my generator. Using the wrong part can make the generator work badly or break it.
I have used brands like LETON POWER and they work well. They make AVRs for many generators. I read reviews and ask others before I buy. Good parts last longer and help my generator run better.
| Maintenance Task | How Often | Why It Matters |
|---|---|---|
| Clean AVR compartment | Every 3 months | Stops dust and water from building up |
| Check connections | Every 3 months | Stops loose wires and bad contact |
| Inspect for wear | Every 6 months | Finds problems early |
| Professional calibration | Yearly | Keeps voltage safe and steady |
Note: Taking care of my generator and using the right parts helps me stop sudden problems and keeps my generator ready when I need it.
I am careful when I change my generator’s voltage regulator. I look for cracks and signs of overheating. I also check for dust around the parts. I put labels on every wire before I start. I check each connection two times to be sure. Doing regular checks helps me find problems early. This keeps my generator safe. Manuals and guides help me understand what to do. If I am not sure, I ask an expert for help.
If I take care of my generator, it gives steady power. This protects my equipment from voltage changes. My home and tools stay safe every time I use the generator.
FAQ
How do I know if my generator’s AVR is bad?
I look for flickering lights, unstable voltage, or trouble starting the generator. Sometimes, I hear odd noises or smell burning. If I see these signs, I check the AVR right away.
Can I replace the AVR myself, or do I need a technician?
I can replace the AVR if I follow safety steps and label every wire. If I feel unsure or see complex wiring, I call a technician for help.
What tools do I need to change an AVR?
I use screwdrivers, a multimeter, pliers, wire cutters, and sticky labels. I keep a notepad and pen close. These tools help me work safely and avoid mistakes.
How often should I check or replace my AVR?
I inspect my AVR every three to six months. If I see damage or the generator acts strange, I replace the AVR right away. Regular checks help me catch problems early.
Will any AVR work with my generator?
No, I always match the AVR model and voltage rating to my generator. Using the wrong AVR can damage the generator or cause unsafe operation.
What should I do if the generator still has problems after changing the AVR?
I double-check all wire connections and test the output with a multimeter. If problems continue, I review the manual or ask a professional for help.
Is it safe to test the generator right after installing a new AVR?
Yes, but I always check all connections first. I wear gloves and eye protection. I start the generator with no load and watch for any issues.

